Privacy concerns, the urge for learning hands-on how those weird things called “servers” work, make people want to explore the amazing world of servers. It is really easy and cheap to have your own VPS (Virtual Private Server), costing sometimes no more than $5 per month! Being so cheap you literally have a “PC” where you can make tests on it, load whatever you want and with a click of a button you can rebuild the whole system, erasing everything like it never existed before, a process you don’t want to do on your own home computer. In this guide/tutorial we explore the inner workings of a server by setting-up a WordPress site with Nginx as a server, MariaDB as the database and Let’s Encrypt (Using certbot) for the SSL certificates. We will also set-up a custom mail server, while securing all the services with SSL certificates and fail2ban service. Server setup will be a fun learning experience following this tutorial.
General Setup
This tutorial is accompanied by a GitHub repository which contains scripts for custom setup of the server. It is advised to go through all the scripts thoroughly, since most of them require custom variables like the username, the hostname and the domain name. The repo can be found here.
Contents
Prerequisites
Before we begin any set-up, it is required that we have access to a VPS. DigitalOcean is the mostly used VPS provider, starting at only $5 per month, with a VPS having 1GB of RAM and 1 core CPU. These specs of the server are more than enough to host a personal website, a personal mail server and more services. To create a droplet you can go on DigitalOcean through this link, from which you get $50 free credit for 30 days. You can find a guide for creating a droplet from the DigitalOcean’s control panel here and also through this page, you’ll find the very first steps required after the creation of the droplet.
>> SWAP Space
After successfully creating a droplet and logging-in, the first thing to do is create a swap file. The swap file serves as an extension to the existing RAM in case the memory is full. The amount of data going to swap is controlled by the swappiness value. The lower the swappiness is, lesser data are going in. Deciding on the swap file size is up to you. I prefer having it set to 4GB, since sometimes when installing or compiling heavy software this space is required. A typical swap size could be round 1GB. To create and activate the swap file and also save it to fstab, to attach at boot, follow the commands below.
# Create the SWAP file and activate it
sudo fallocate -l 4G /swapfile && sudo chmod 600 /swapfile
sudo mkswap /swapfile && sudo swapon /swapfile

echo '/swapfile none swap sw 0 0' | sudo tee -a /etc/fstab
echo 'vm.swappiness=10' | sudo tee -a /etc/sysctl.conf
>> Repo and package update
The next important action to be taken is to update the packages of the server and sync the repositories with the latest content. Some packages are also required to be installed in general so that specific commands could work. Along with the packages, we are going to include some external repositories too, by adding them to apt, with the key included. With the commands below we firstly install some required packages and then we add the keys for the repositories that we will use and we also add the necessary links in the sources.list.d folder.
#Update the repos and install the required packages
sudo apt update
sudo apt install -y htop curl git dpkg-dev gnupg curl wget

# Get the keys for the repositories to be added
wget --quiet -O - https://www.postgresql.org/media/keys/ACCC4CF8.asc | sudo apt-key add -
wget --quiet -O - http://repo.mosquitto.org/debian/mosquitto-repo.gpg.key | sudo apt-key add -
wget --quiet -O - http://nginx.org/keys/nginx_signing.key | sudo apt-key add -
curl -sSL https://repos.insights.digitalocean.com/install.sh | sudo bash

# Save the repos in the relevant files
sudo sh -c "echo 'deb https://repo.mosquitto.org/debian buster main' >> /etc/apt/sources.list.d/mosquitto.list"
sudo sh -c "echo 'deb http://nginx.org/packages/mainline/debian/ buster nginx' >> /etc/apt/sources.list.d/nginx.list"
sudo sh -c "echo 'deb http://apt.postgresql.org/pub/repos/apt/ buster-pgdg main' >> /etc/apt/sources.list.d/pgdg.list"

# Sync the new changes and upgrade, if any
sudo apt update && sudo apt upgrade
>> Domain name setup
With the droplet setup we are ready to begin exploring the inner workings of the server, but we need one more step and that is the domain. A domain name is required if we want to have a working WordPress installation, since it is easier for people to remember words than numbers. There are numerous domain name providers like GoDaddy and NameCheap, personally I prefer Namecheap. In any case create an A record using the IP from the droplet’s dashboard. It is better to name your droplet as www.domain.com, because in this way a PTR record will be created, something that is a must for the mail server later. You can also see the tutorial on how to add a domain on DigitalOcean here.
WordPress Setup
File setup
Having installed the required packages and updated the repos, we can move on to installing the rest of the software. The easiest thing to install first is WordPress, because you simply download and extract it. We also change the file permissions to prevent foreign access for sensitive information. While the usual location for the web files is /var/www/html, personally I prefer having them in another folder, existing in the ~ directory. Let’s name this folder webfiles and the path for is ~/webfiles, where the sub-folders will be the different services, like WordPress, web mail client, etc. Below the commands for downloading WordPress, creating the webfiles folder and changing the permissions are presented.
# Create the folder
mkdir -p ~/webfiles

# Download WordPress, extract the file contents and move them to the webfiles folder
wget https://wordpress.org/latest.tar.gz -O wordpress.tar.gz
tar xvf wordpress.tar.gz && mv wordpress/ ~/webfiles && rm -rf wordpress.tar.gz

# Change the ownership of the webiles folder and the file permissions, change the `username` to your system username
cd ~/webfiles && sudo chown -R username:www-data .
find . -type d -exec chmod 755 {} \;
find . -type f -exec chmod 644 {} \;
MariaDB (MySQL)
WordPress is now ready in regards of the required files! Now we have to install the database server and also set it up, to interface with the WordPress installation later. First generate one password, using the command provided below, for each user to be created. In this case generate and keep the password for the root database user and the user for the WordPress database. When first prompted in the initial database setup, leave the root password blank for the database, while answering y to all the questions. After setting up, do not forget to restart the database server service.
# Install MariaDB server
sudo apt install -y mariadb-server

# Generate password for the different database users
echo -n @ && cat /dev/urandom | env LC_CTYPE=C tr -dc [:alnum:] | head -c 15 && echo

# Initial MySQL setup, answer `y` to all questions and input the new root password
sudo /usr/bin/mysql_secure_installation

# Restart the database server service
sudo systemctl restart mysql
What is left now, regarding the database, is the table and the user creation to be used from WordPress. By running the command:
sudo mysql -u root -pwe get access in the MySQL interface, looking something like the following:
Welcome to the MariaDB monitor.  Commands end with ; or \g.
Your MariaDB connection id is 1100
Server version: 10.3.15-MariaDB-1 Debian 10

Copyright (c) 2000, 2018, Oracle, MariaDB Corporation Ab and others.

Type 'help;' or '\h' for help. Type '\c' to clear the current input statement.

MariaDB [(none)]>
where we can write database queries. In order to create the database for the WordPress, we need to run the query commands presented below, one by one. Remember the user password is the one we generated above. Replace the user and password with the desired username and the generated password respectively.
CREATE DATABASE wordpress;
CREATE USER 'user'@'localhost' IDENTIFIED BY 'password';
GRANT ALL PRIVILEGES ON wordpress.* TO 'user'@'localhost';

FLUSH PRIVILEGES;
PHP
The next step before installing the server software is to install PHP core and some modules which are required for normal WordPress operation. Some of the modules installed, cover the services we are going to install later. Installing PHP with the modules is not enough, since configuration is a must. We are gonna create some required folders too.
# Install the necessary PHP modules with the PHP core
sudo apt install -y php php-fpm php-json php-xmlrpc php-curl php-gd php-xml php-mbstring php-mysql php-imagick php-zip php-ldap

# Create the required folders
sudo mkdir /var/run/php-fpm
sudo mkdir -p /usr/share/nginx/cache/fcgi
mkdir ~/logs && touch ~/logs/phpfpm_error.log
The file that we will first configure is the php-fpm.conf, residing in /etc/php/7.3/fpm. In this directory and all the subsequent directories, replace the 7.3 with the currently installed PHP version. Also always keep a backup of the original files.
[global]
pid = /run/php/php7.3-fpm.pid
error_log = /var/log/php-fpm.log
include=/etc/php/7.3/fpm/pool.d/*.conf
Next, copy the configuration as seen below in the php.ini, residing in the same directory as the previous file. Also keep a backup of the original. Fine tuning of the following configuration file is dependent on each user and use case.
Finally, we have two more files to configure before we can safely say that the PHP service is ready. The first file is the www.conf, residing in /etc/php/7.3/fpm/pool.d/. Copy the following configuration and tune to your needs. Usually this file is not used in our case, but be very careful with the name in the listen section.
[default]
security.limit_extensions = .php
listen = /var/run/php/default.sock
listen.owner = www-data
listen.group = www-data
listen.mode = 0660
user = www-data
group = www-data
pm = dynamic
pm.max_children = 10
pm.start_servers = 2
pm.min_spare_servers = 2
pm.max_spare_servers = 10
pm.max_requests = 200

env[PATH] = /usr/local/bin:/usr/bin:/bin
env[TMP] = /tmp
env[TMPDIR] = /tmp
env[TEMP] = /tmp
The last and important file is the one that we will be creating. In my case I named it wordpress.conf and the configuration can be seen below. This file resides in the same directory as the www.conf file. Do not forget to replace the hostname below with your server’s hostname and the username with your system’s username. You can get the hostname with the hostname command.
[hostname]
listen = /var/run/php/hostname.sock
listen.owner = username
listen.group = www-data
listen.mode = 0660
user = username
group = www-data
pm = dynamic
pm.max_children = 8
pm.start_servers = 2
pm.min_spare_servers = 2
pm.max_spare_servers = 6
pm.max_requests = 150

php_admin_value[upload_max_filesize] = 25M
php_admin_value[error_log] = /home/username/logs/phpfpm_error.log
php_admin_value[open_basedir] = /home/username:/tmp

env[PATH] = /usr/local/bin:/usr/bin:/bin
env[TMP] = /tmp
env[TMPDIR] = /tmp
env[TEMP] = /tmp
Before moving on we have to restart the PHP service so that the new files are used. We can do that with the command below:
sudo systemctl restart php7.3-fpmNginx
Finally the time has come to install our server software which is Nginx, which is easily configurable and secure web server and proxy. You can see the required packages in the command below. Same with PHP, Nginx is no exception is the configuration. After installing Nginx we will configure it to be able to use it with our WordPress installation and also generate our SSL certificates through certbot.
sudo apt install nginx certbot

# Create a folder for the certbot challenges later
mkdir ~/webfiles/letsencrypt
>> SSL Configuration
After Nginx installation we will first generate the SSL certificates, but in order to do that, we need to setup a path for the certbot to put the challenges in and verify the domain ownership. Copy the configuration code as seen below and save it in a file called preferably redirect.conf in /etc/nginx/conf.d/. Do not forget to replace the username in the below configuration with your system’s username and also restart Nginx after creating the file with the command sudo systemctl restart nginx.
server {
	listen 80 default_server;
	listen [::]:80 default_server;

	location ^~ /.well-known/acme-challenge/ {

		# Set correct content type. According to this:
		# https://community.letsencrypt.org/t/using-the-webroot-domain-verification-method/1445/29
		# Current specification requires "text/plain" or no content header at all.
		# It seems that "text/plain" is a safe option.
		default_type "text/plain";

		# This directory must be the same as in /etc/letsencrypt/cli.ini
		# as "webroot-path" parameter. Also don't forget to set "authenticator" parameter
		# there to "webroot".
		# Do NOT use alias, use root! Target directory is located here:
		# /var/www/common/letsencrypt/.well-known/acme-challenge/
		root         /home/username/webfiles/letsencrypt;
	}

	# Hide /acme-challenge subdirectory and return 404 on all requests.
	# It is somewhat more secure than letting Nginx return 403.
	# Ending slash is important!
	location = /.well-known/acme-challenge/ {
		return 404;
	}

	location / {
		return 301 https://$host$request_uri;
	}
}
Now that we have our path setup, run the following command to obtain the SSL certificates from let’s encrypt authority. In the -d argument put your main domain and subdomains in a comma separated fashion.
sudo certbot certonly --cert-name domain.com --email [email protected] --webroot -w /home/username/webfiles/letsencrypt -d domain.com,www.domain.com --rsa-key-size 4096 --preferred-challenges http-01 --must-stapleCertificate renewal is not automatic, so we have to setup a cron job to take care of it. Run the commands below to add a cron job as root for the certificate renewal.
sudo crontab -l > cron_jobs
echo '14 5 * * * /usr/bin/certbot renew -w /home/username/webfiles/letsencrypt --quiet --post-hook "/usr/bin/systemctl restart nginx"' >> cron_jobs
sudo crontab cron_jobs && rm -rf cron_jobs
Now it’s time to generate the DH parameters for the encryption. Running the command below will take really long time, maybe more than 10 minutes, so if you want a faster time you can change the size from 4096 to 2048. You can read more about Diffie-Hellman (DH) key exchange in this relevant Wikipedia article.
sudo openssl dhparam -out /etc/nginx/dhparams.pem 4096>> General configuration files
Saving specific configurations in separate files, makes the organization better. Below you can find the different configurations we will use to setup the Nginx’s virtual servers. The files according to this guide’s flow, will be saved in /etc/nginx/config/. The first file we have below is the fastcgi.conf, which controls the basic fastCGI parameters. FastCGI is the protocol used to interface interactive apps with the web server. You can find more information about FastCGI here. In the configuration below, change the hostname with your system’s hostname, as you did in the PHP configuration above.
# Cache
fastcgi_cache microcache;
fastcgi_cache_valid 200 60m;
fastcgi_cache_valid 404 10m;


# General FastCGI handling
fastcgi_pass unix:/var/run/php/hostanme.sock;
fastcgi_pass_header Set-Cookie;
fastcgi_pass_header Cookie;
fastcgi_ignore_headers Cache-Control Expires Set-Cookie;
fastcgi_split_path_info ^(.+\.php)(/.+)$;
fastcgi_param SCRIPT_FILENAME $request_filename;
if (!-f $document_root$fastcgi_script_name) {
	return 404;
}

fastcgi_intercept_errors on;
include /etc/nginx/fastcgi_params;
The following configuration file is the ssl_security.conf, which contains all the necessary definitions and parameters used in the SSL exchange. It contains the full path for the private key, the CSR certificate and the DH parameters. Replace the domain with your domain’s name. Note that we only support TLSv1.2 and above, with the server ciphers being all 256 bit long.
# SSL certificates
ssl_certificate /etc/letsencrypt/live/domain.com/fullchain.pem;
ssl_certificate_key /etc/letsencrypt/live/domain.com/privkey.pem;
ssl_trusted_certificate /etc/letsencrypt/live/domain.com/chain.pem;

# Diffie-Hellman parameters for DHE cipher suites
ssl_dhparam /etc/nginx/dhparams.pem;

# Protocols
ssl_protocols TLSv1.2 TLSv1.3;
ssl_ciphers EECDH+CHACHA20:EECDH+AESGCM:EECDH+AESCCM:!AES128;
ssl_ecdh_curve X448:secp521r1:secp384r1;
ssl_prefer_server_ciphers on;
The ssl_session.conf seen below, is used for controlling the SSL session parameters, like the OCSP stapling, which is an authentication mechanism to ensure the certificate in exchange is valid.
# Session settings
ssl_session_timeout 1d;
ssl_session_cache shared:SSL:10m;  # about 40000 sessions
ssl_session_tickets off;

# OCSP stapling
ssl_stapling on;
ssl_stapling_verify on;
The last file we have is seen below and it is the strict_transport.conf file, which adds the necessary security headers. You can find more information about HSTS strict transport here.
# HSTS (ngx_http_headers_module is required) (63072000 seconds)
add_header X-XSS-Protection "1; mode=block" always;
add_header X-Content-Type-Options "nosniff" always;
add_header Referrer-Policy "no-referrer-when-downgrade" always;
add_header Strict-Transport-Security "max-age=31536000; includeSubDomains; preload" always;
#add_header X-Frame-Options DENY; # Brakes elementor
>> WordPress Configuration
Any service that is passing through Nginx has to have its own virtual server definition and specific settings. These settings are usually provided in the service’s page or by googling for thr Nginx configuration for the corresponding service. Also some of these settings will come with the time, through various needs and errors which will be shown. The following configuration must reside in the /etc/nginx/conf.d directory and the name of the file does not matter, as long as it suffixed as .conf. In this guide we will name the file wordpress.conf since it concerns the WordPress installation. Do not forget to change the username and the domain fields in the configuration below.
server {
	listen       443 ssl http2;
	listen       [::]:443 ssl http2;

	server_name  domain.com www.domain.com;

	client_max_body_size 20m;

	index index.php index.html index.htm;
	root   /home/username/webfiles/wordpress;

	# Include SSL configuration
	include /etc/nginx/config/strict_transport.conf;

	location / {
		try_files $uri $uri/ /index.php?q=$uri&$args;
	}

	# pass the PHP scripts to FastCGI server
	location ~ \.php$ {
		# Basic
		try_files $uri =404;
		fastcgi_index index.php;

		# Create a no cache flag
		set $no_cache "";

		# Don't ever cache POSTs
		if ($request_method = POST) {
			set $no_cache 1;
		}

		# Admin stuff should not be cached
		if ($request_uri ~* "/(wp-admin/|wp-login.php)") {
			set $no_cache 1;
		}

		# WooCommerce stuff should not be cached
		if ($request_uri ~* "/store.*|/cart.*|/my-account.*|/checkout.*|/addons.*") {
			set $no_cache 1;
		}

		# If we are the admin, make sure nothing gets cached, so no weird stuff will happen
		if ($http_cookie ~* "wordpress_logged_in_") {
			set $no_cache 1;
		}

		# Cache and cache bypass handling
		fastcgi_no_cache $no_cache;
		fastcgi_cache_bypass $no_cache;

		include /etc/nginx/config/fastcgi.conf;
	}

	location ~* \.(js|css|png|jpg|jpeg|gif|ico|woff|ttf|svg|otf)$ {
		expires 30d;
		add_header Pragma public;
		add_header Cache-Control "public";
		access_log off;
	}

	# favicon.ico
	location = /favicon.ico {
		log_not_found off;
		access_log off;
	}

	# robots.txt
	location = /robots.txt {
		log_not_found off;
		access_log off;
	}

	# assets, media
	location ~* \.(?:css(\.map)?|js(\.map)?|jpe?g|png|gif|ico|cur|heic|webp|tiff?|mp3|m4a|aac|ogg|midi?|wav|mp4|mov|webm|mpe?g|avi|ogv|flv|wmv)$ {
		expires 7d;
		access_log off;
	}

	# svg, fonts
	location ~* \.(?:svgz?|ttf|ttc|otf|eot|woff2?)$ {
		add_header Access-Control-Allow-Origin "*";
		expires 7d;
		access_log off;
	}

	# Deny access to .htaccess files
	location ~ /\.ht {
		deny  all;
	}

	location ~ /\.(?!well-known) {
		deny all;
	}
}
One more file to add in the conf.d directory is the following, which prohibits any traffic in servers that are not declared explicitly, like the file above. The name of it is service_deny.conf.
server {
	listen 443 default_server;
	listen [::]:443 default_server;

	server_name _;
	return 404;
}

server {
	listen 80;
	listen [::]:80;

	server_name _;
	return 404;
}
Finally we add the following configuration in /etc/nginx and the name of it is nginx.conf. Make a backup of the existing file first. With the configuration below we declare the streams that the server is going to handle, including the general settings for the respective stream.
user www-data;
worker_processes auto;
pid /run/nginx.pid;
include /etc/nginx/modules-enabled/*.conf;

events {
	multi_accept on;
	worker_connections 768;
}

http {
	# Basic Settings
	sendfile on;
	charset utf-8;
	tcp_nopush on;
	tcp_nodelay on;
	keepalive_timeout 65;
	types_hash_max_size 2048;
	server_tokens off;

	include /etc/nginx/mime.types;
	default_type application/octet-stream;

	# SSL Settings
	include config/ssl_security.conf;
	include config/ssl_session.conf;

	# Logging Settings
	access_log /var/log/nginx/access.log;
	error_log /var/log/nginx/error.log;

	# Gzip Settings
	gzip on;
	gzip_vary on;
	gzip_disable "msie6";
	gzip_types text/plain text/css text/html application/x-javascript application/font-sfnt application/json application/javascript text/xml application/xml application/xml+rss text/javascript;

	# FastCGI cache path
	fastcgi_cache_path /usr/share/nginx/cache/fcgi levels=1:2 keys_zone=microcache:10m max_size=1024m inactive=1h;

	# Virtual Host Configs
	include /etc/nginx/conf.d/*.conf;
}
As always with the services, before we can use it with the new configuration, we have to restart it. We can do that for Nginx using the following command.
sudo systemctl restart nginxInitializing WordPress
So far we have done all the “dirty” work necessary to have the infrastructure ready to start our WordPress journey. Once the above setup is done, the first thing to see is the language selection screen, as shown below, by going to your root domain to begin the setup process.
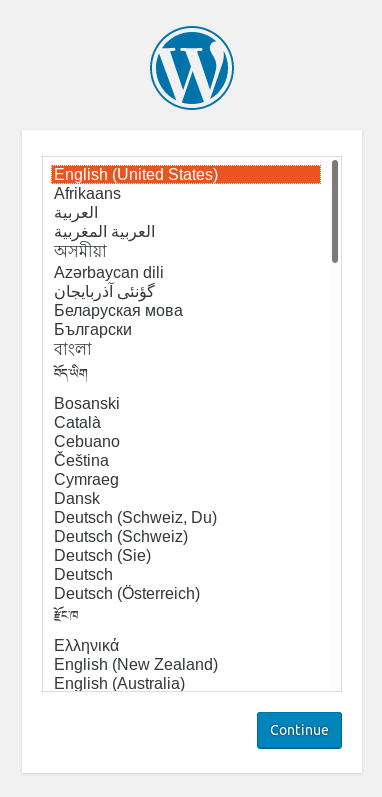
Select the language you want and move on to the database setup. You have to remember the credentials we created before for the wordpress database. As per this tutorial the database name is wordpress, the username is the'user' field set during the setup with the corresponding password. In our case the database host is localhost. For the database prefix choose one that is different than wp_ for increased security, preferably one with lowercase, uppercase and number combination, always ending in _ in order to be readable in the database tables.

After a successful database setup, the next and last screen is the site information and user setup screen. Here you enter your site name, username, password and user email. It is recommended to discourage search engines from indexing this site, until the site is ready to be served to the world. It is up to the search engine’s bot to respect this request.

Accessing the admin panel after the installation is easy, just type /wp-admin or /admin to your root domain. More information about the WordPress setup process can be found here.
Mail Setup
Setting up a mail server can be a tricky process, through which you gain a lot of knowledge on the inner workings of the mail servers. One of the main concerns is having other email providers, like Google, trust your custom mail server and not reject your emails. Following the instructions below, you can setup a mail server and have your mails accepted, at least by Google. The first thing to start with is running the commands below to install the necessary packages and create the required folders.
sudo apt install -y postfix postfix-policyd-spf-python dovecot-core dovecot-imapd opendkim opendkim-tools

sudo mkdir -p /etc/opendkim/keys
sudo gpasswd -a postfix opendkim # Add the opendkim user to postfix
Postfix configuration
After installing the above, the postfix and dovecot services will be running, but we need to set them up in order to have the desired functionality. Create a backup of the original master.cf file, and replace it with the following configuration. The file resides in the /etc/postfix/ directory by default.
# Postfix master process configuration file.
submission inet n       -       y       -       -       smtpd
  -o syslog_name=postfix/submission
  -o smtpd_tls_security_level=encrypt
  -o smtpd_sasl_auth_enable=yes

pickup    unix  n       -       y       60      1       pickup
cleanup   unix  n       -       y       -       0       cleanup
qmgr      unix  n       -       n       300     1       qmgr
tlsmgr    unix  -       -       y       1000?   1       tlsmgr
rewrite   unix  -       -       y       -       -       trivial-rewrite
bounce    unix  -       -       y       -       0       bounce
defer     unix  -       -       y       -       0       bounce
trace     unix  -       -       y       -       0       bounce
verify    unix  -       -       y       -       1       verify
flush     unix  n       -       y       1000?   0       flush
proxymap  unix  -       -       n       -       -       proxymap
proxywrite unix -       -       n       -       1       proxymap
smtp      unix  -       -       y       -       -       smtp
relay     unix  -       -       y       -       -       smtp

showq     unix  n       -       y       -       -       showq
error     unix  -       -       y       -       -       error
retry     unix  -       -       y       -       -       error
discard   unix  -       -       y       -       -       discard
local     unix  -       n       n       -       -       local
virtual   unix  -       n       n       -       -       virtual
lmtp      unix  -       -       y       -       -       lmtp
anvil     unix  -       -       y       -       1       anvil
scache    unix  -       -       y       -       1       scache

maildrop  unix  -       n       n       -       -       pipe
  flags=DRhu user=vmail argv=/usr/bin/maildrop -d ${recipient}

uucp      unix  -       n       n       -       -       pipe
  flags=Fqhu user=uucp argv=uux -r -n -z -a$sender - $nexthop!rmail ($recipient)

# Other external delivery methods.
ifmail    unix  -       n       n       -       -       pipe
  flags=F user=ftn argv=/usr/lib/ifmail/ifmail -r $nexthop ($recipient)
bsmtp     unix  -       n       n       -       -       pipe
  flags=Fq. user=bsmtp argv=/usr/lib/bsmtp/bsmtp -t$nexthop -f$sender $recipient
scalemail-backend unix	-	n	n	-	2	pipe
  flags=R user=scalemail argv=/usr/lib/scalemail/bin/scalemail-store ${nexthop} ${user} ${extension}
mailman   unix  -       n       n       -       -       pipe
  flags=FR user=list argv=/usr/lib/mailman/bin/postfix-to-mailman.py
  ${nexthop} ${user}
policyd-spf  unix  -       n       n       -       0       spawn
  user=policyd-spf argv=/usr/bin/policyd-spf
Also do the same for the main.cf file, residing in the same directory as the master.cf. The main.cf configuration can be found below and notice the highlighted lines, because these are the ones that you need to change and adapt to your custom installation and conditions.
# See /usr/share/postfix/main.cf.dist for a commented, more complete version

# Debian specific:  Specifying a file name will cause the first
# line of that file to be used as the name.  The Debian default
# is /etc/mailname.

smtpd_banner = $myhostname ESMTP $mail_name (Debian/GNU)
biff = no

# Appending .domain is the MUA's job.
append_dot_mydomain = no

# Uncomment the next line to generate "delayed mail" warnings
#delay_warning_time = 4h

# No Readme directory
readme_directory = no

# See http://www.postfix.org/COMPATIBILITY_README.html -- default to 2 on fresh installs.
compatibility_level = 2

# TLS parameters
smtpd_tls_cert_file = /etc/letsencrypt/live/domain.com/fullchain.pem
smtpd_tls_key_file = /etc/letsencrypt/live/domain.com/privkey.pem
smtpd_tls_CAfile = /etc/letsencrypt/live/domain.com/chain.pem
smtpd_use_tls = yes

# TLS caches
smtpd_tls_session_cache_database = btree:${data_directory}/smtpd_scache
smtp_tls_session_cache_database = btree:${data_directory}/smtp_scache

smtpd_tls_auth_only = no
smtpd_tls_security_level = encrypt
smtpd_tls_mandatory_ciphers = high
smtpd_tls_mandatory_exclude_ciphers = aNULL, MD5
smtpd_tls_mandatory_protocols = !SSLv2, !SSLv3

smtpd_helo_required = yes
smtp_tls_note_starttls_offer = yes
smtp_tls_security_level = may
smtp_tls_loglevel = 1
smtp_use_tls = yes

# See /usr/share/doc/postfix/TLS_README.gz in the postfix-doc package for information on enabling SSL in the smtp client.
smtpd_relay_restrictions = permit_mynetworks permit_sasl_authenticated defer_unauth_destination
mydomain = domain.com
myhostname = mail.domain.com
mydestination = mail.$mydomain, domain.com, domain.localdomain, localhost.localdomain, localhost
alias_maps = hash:/etc/aliases
alias_database = hash:/etc/aliases
myorigin = /etc/mailname
relayhost =
relay_domains =
mynetworks_style = host
mynetworks = 127.0.0.0/8 [::ffff:127.0.0.0]/104 [::1]/128
mailbox_size_limit = 0
recipient_delimiter = +
inet_interfaces = all
inet_protocols = all
home_mailbox = Maildir/
virtual_alias_maps = hash:/etc/postfix/virtual

# SMTP-Auth settings
smtpd_sasl_type = dovecot
smtpd_sasl_path = private/auth
smtpd_sasl_auth_enable = yes
smtpd_sasl_security_options = noanonymous
smtpd_sasl_local_domain = $myhostname
smtpd_recipient_restrictions = permit_mynetworks,permit_auth_destination,permit_sasl_authenticated,reject,reject_unauth_destination,check_policy_service unix:private/policyd-spf
smtpd_sender_restrictions = reject_unknown_sender_domain
smtp_sasl_password_maps = hash:/etc/postfix/sasl/sasl_passwd
policyd-spf_time_limit = 3600

# Milter configuration
milter_default_action = accept
milter_protocol = 6
smtpd_milters = local:/opendkim/opendkim.sock
non_smtpd_milters = $smtpd_milters

# Disable email address verification
disable_vrfy_command = yes
The way that we are gonna be setting up mail accounts is through virtual accounts in postfix. To do that create a file called virtual in /etc/postfix. In this file you write the desired email and the associated user. An example file can be found below.
[email protected] username
[email protected] root
As a final step in the postfix configuration, we need to create the SASL authentication password for our SMTP mail server. This is done through the sasl_passwd file residing in the /etc/postfix/sasl folder. You should format the file contents as show below.
[mail.domain.com]:587 username:passwordBefore we move on to dovecot’s configuration, we need to run the postmap command to create a lookup table for the virtual accounts and the SASL password authentication file. More info about the postmap command can be found here. Also we need to restart the postfix service, so that all the changes we made take effect. Run the commands as shown below.
sudo postmap /etc/postfix/virtual && sudo postmap /etc/postfix/sasl/sasl_passwd
sudo systemctl restart postfix
Dovecot configuration
Mail server setup tutorial is under development
SPF and DKIM configuration
Extras
Coming shortly